Improving the Most Obnoxious of Chores: Homemade, Natural Laundry Detergent

For the first couple of months after our first couple of months in Buffalo, our first apartment together didn’t have a washer or dryer. I would haul three or four bags in 100% humidity and 100 degree heat to the laundromat around the corner that was owned by a Burmese immigrant every week just to clean our clothes. While I was always offered free coffee and free help by the men in the store, every afternoon would ultimately result in me struggling hard with big loads and big machines in the horrific conditions until I sweat all over the fresh laundry. Then there’s the folding, and the pushing a mountain of items into your overstuffed dresser, and the hanging on crappy hangers…And who doesn’t love when you forget to flip your clothes and they get to stinking like rotting foliage in the washing machine overnight? Just perfection.

What is that phrase that young folks say nowadays? “First world problems.” But really, I consider it more of an urban dilemma; I would happily wash my clothes in a clean, cool, nearby creek instead of in a hot vat of store-bought chemicals. You know, if there were a creek in the backyard instead of neighbors and all their own chemical backwash.

As part of my determination to purge harmful chemicals from our household, I made a list of all the different products that taint us by going in our mouths, touching our skin, etc. Laundry detergent makes that list, and like many other household products, affects both the human body and the surrounding environment. This goes beyond common concerns about impacts on the watershed in a give area; these products also negatively affect the air quality in our homes because of toxins that they emit and aren’t packaged in an easily reusable design, contributing to more plastics in landfills (when people don’t recycle) and in recycling (which can release toxic fumes in the recycle process) rather than being used again right at home. By making your own laundry detergent, you help to solve all of these problems. Better for the environment, better for you, and amazing for your clothes, this laundry detergent is cheap, easy, effective, smart, adaptable, HE-compatible, and smells great! With the inspiration I derived from Wellness Mama and Bonzai Aphrodite, I’ve got my own blend that has worked well for us.

Tip: You need a funnel, a 2 gallon pot, and 2 empty laundry jugs to make this recipe.

This will take a while...plan for about 20 minutes. Seriously.

This will take a while…plan for about 20 minutes. Seriously.

Summer Garden Laundry Detergent
1 bar castile soap (I use Kirk’s – good quality and cheaper than Dr. Bronner’s)
Water
Washing soda (had a bit of a hard time finding, Tops or Wegmans if you’re a WNY’er)
Borax
Baking soda
Ylang ylang essential oil

– Grate half a bar of castile soap on an old cheese grater (smallest or second-to-smallest grates will both work). I have found it useful to have a cheese grater specifically for kitchen work, and another specifically for household work – but it’s not necessary as long as you clean all that soap off of it well.

Bubble, bubble...

Bubble, bubble…

– Add soap to a large 2 gallon pot (we got ours for making beer) and dissolve it in a half gallon of water on medium-low heat. This should only take a few minutes (less than ten). Be sure to stir through and double check that the soap is completely dissolved, keeping in mind that using the second largest grate hole will mean waiting a bit longer to dissolve the soap.

Almost ready to do all the hard work for you!

Almost ready to do all the hard work for you!

-Right before you are ready to take the soap and water off the stove, begin running your hot water faucet until the water gets really, reeeeally hot. Remove the pot from the burner and add 1.5 gallons of that really hot water, stirring very gently. Then, add 1/2 cup of washing soda (sodium carbonate), 1/2 cup of baking soda (sodium bicarbonate), and 20-30 drops of ylang ylang essential oil (or to “taste”).

Gotta have all your stuff together.

Gotta have all your stuff together.

– Fill one laundry jug with this mixture by placing a funnel in the spout and gently pouring the detergent in. This is your “dark load” detergent. Then, set the pot back down and add about 1/2 cup of Borax to the pot and stir gently one more time. Fill the second laundry jug with the remaining detergent; this is your “light load” detergent. You’ll want to take note of the distinction, because one downside of the Borax is that it can make darker colors, particularly blacks, fade faster than you’d probably like. So, label! Or, if you’re like me and have jugs of different design on hand, I would recommend putting the “lights” detergent in the lighter jug.

Tip: Because you tend to run out of dark load detergent faster (most of us wear more darks than lights), I have a third and even fourth jug on hand so that you can make the batches only as you need them. Ask friends, neighbors, coworkers, or even laundromats for their empties so you can have backups, too.

And that’s it! Let the detergents cool overnight, shake, and use less than a 1/2 cup for a normal/large load! If you want to put vinegar in a fabric softener ball for the rinse cycle, you certainly can, but I can tell you I don’t bother. This recipe is so cheap. I paid 2-something for each box of Borax and washing soda, 99 cents for the bar of castile soap, less than 75 cents for a box of baking soda, and less than $10 for ylang ylang – plus, I use most of these ingredients in other products. Also, the jugs are technically free because they are reused.

Yup, we just made laundry better.

Note: The Environmental Working Group and other organizations note potential health hazards to using Borax; the EWG rates it as an “F” on its website www.ewg.org. You do not have to use Borax at all; you can increase the washing soda just a bit, and definitely increase the baking soda, to compensate. On a personal note, I don’t think a 1/2 cup of Borax in a huge jug of laundry detergent and airtight storage is a dangerous level of exposure, but it is up to you to decide. I wanted to try the recipe with it and without it, and while my whites come out very very clean, it is probably not entirely necessary. Rather than dump it, I am choosing to use it until it’s gone.
The rest of the ingredients in this recipe are rated very well by the EWG and are considered safe for humans and the environment.

Bein’ Fat and Polish: Carb-Loaded Vegan Pierogi

Oh-gy Pierogi! Damn, it’s good to be Polish.

Why?

Because although, yes, Italians have gnocchi and tortellini, and Americans have chicken dumplings or whatever, and Asian cultures have steamed buns and such, there is just not a good comparison between the joys of eating one of those definitely delicious foods and the mind-blowing physical experience of a perfectly pressed and presented pierogi.

Pyrohy

Mmmmm sweet, salty, doughy deliciousness. Even on your thighs.

For those of you who may not be familiar with these Polish staples, pierogi are made by letting rise a simple dough, stuffing with any number of ingredients, pressing around the stuffing, and then boiling the dumplings to cook. The best way to enjoy them? Sauteed in the skillet, with some butter, margarine, or oil all up in there to get it snuggled and crisped. Oh, it’s perfection when you get a springy dough, a moist and plump middle, and a bit of crunch on your exterior that’s also a little salty on the tongue. And, of course, you gotta finish it off with a good sauce. Old schoolers will tell you a pyrohy is nothing without sour cream, and while I am inclined to agree, our diet is not. So, here, in addition to providing you with the recipe I used, which is done in the traditional eggless way, I also present you with two different (vegan) fillings I came up with and a fricking fabulous sauce that is creamy, tangy, and utilizes one can’t-live-without ingredient for most Poles (you know, besides sour cream): a good horseradish.

I used the dough recipe from Tasting Poland with MUCH success; the dough was smooth, easy to work with, not too sticky, and yielded very springy, firm pierogi when boiled – which, from my experience eating and making pierogi, is exactly what you’re looking for. Once the pierogi are properly stuffed and pressed into dumplings, drop them into boiling water and allow them to float to the top, stirring frequently enough to keep them from sticking to the bottom of the saucepan, sides of the saucepan, their pierogi friends…pretty much anything. They’re sticky while they boil! Once they float, boil them an additional 3-5 minutes, testing them for firmness, doneness, and a touch of spring when you gently push them. Imagine that they should resemble the Pillsbury dough boy in “pushback” when given a gentle but solid poke. Don’t be afraid to burn your finger.
Note: I used 100% whole wheat flour both times I made this dough and only found that I needed to add a bit more water and a bit more rising time, but that is typical of any baking or cooking done with whole wheat flour when a recipe doesn’t necessarily call for it. Expect approx. 1/4-1/2 c. extra water per batch, and about 5-10 extra min. of rising time.

Paper bag pierogis

These are just the leftover dumplings; imagine row upon row of orgasmic pierogi here instead.

Here’s a great reason to ask for paper instead of plastic if you forget your reusable bags at the grocery store (or if you like to walk to the liquor store and need something opaque for your return journey): you can use them to drain all that extra fluid from your freshly boiled pierogis lest you decide to throw them in all wet and end up with tiny burning droplets of oily liquid sun fire reigning down on you like arrows in a scene from 300. ‘Cause that happens. So, you’ll drain the boiled pierogis for a few minutes at least, then saute them on medium to medium-high heat in your fat of choice until they are your desired brown. We love Canoleo Soft Margarine because it’s vegan and genuinely tastes like salted butter, but is both not butter and not made from 100% canola oil like many other margarines. However, olive oil for savory pierogis, grapeseed oil for either savory or sweet pierogis, your favorite vegan margarine, or whatever oil/fat you please depending on your existent or non-existent dietary preferences should work just fine. I can’t recommend grapeseed oil enough for something new to try once in a while; it has a high flash point, neutral taste, and a lot of purported health benefits, including its high level of omega-6 fatty acids.

Sweet Filling: Apple-Cran
3 medium peeled apples, diced
~1/4 c. dried cranberries
margarine
brown sugar
a bit of lemon juice
fresh ground nutmeg

Simmer the ingredients (most of them to taste) on medium-low heat until the mixture begins to get sweaty and juicy, about 20-30 minutes. The lemon juice will keep the fruit from browning due to air exposure, and cuts through some of the sweetness. Fill your pierogis carefully, trying hard not to get any fruit juice on the outer portion of the dough where you will be pressing the dumplings closed. These were very good plain and with vegan sour cream.

Filling 2: A New Spin on Tradition in Potato and Onion
about 5 large red potatoes, cubed
about 3 stalks of green onion, diced very small
minced garlic
a little olive oil
salt, pepper, and basil or parsley to taste
optional: tofu, Boca veggie crumbles, or seitan

For this filling, boil the potatoes until soft enough to mash, about 20 minutes depending on the size of your cubes. Drain into a strainer, rinse in very cold water, and then mash by hand in a large bowl. Mix in other ingredients (again, most of them to taste, but go easy on the oil) and let sit in the refrigerator for at least 30 minutes to let the flavors get acquainted. Stuff the pierogis, boil, saute, and eat with this awesome sauce:

Saucin’ the Supper: Vegan Creamy Horseradish Sauce
1 ramekin of vegan mayonnaise (we use Grapeseed Vegenaise)
good horseradish (we buy ours at the Broadway Market in Historic Polonia, so we know it’s good)
lemon juice
onion powder

Mix the ingredients until you get just enough kick from the horseradish, and an acceptable consistency from the lemon juice (you could also use apple cider or white vinegar). You won’t want to leave out a bit of onion flavor from the onion powder, or, if you like onions more than I do, you can add some diced green onion to the sauce and enjoy. If eating with people who are unsure about the enjoyment they may derive from horseradish, put the ingredients on the table and have a make-your-own-sauce party. Personally, I add at least 2 tbsp. of horseradish to every 1/4 or 1/3 cup of Vegenaise. I love the slight kick in the back of the nose and the slightly sweet taste of tart vinegar and root that every childhood family get-together was punctuated with in the presence of my Polish grandfather.

Moral of the story? Vegans can still get their Polish on. So next year, when you go out to buy your pussy willows and squirt guns for Dyngus Day, make sure you stock up on more than just Sobieski so you can enjoy these delicious pyrohy.

vodkasobieski.com

commons.wikimedia.org

Happy Treats: Vegan Peanut Butter Puff Balls

My most sought-after vegan treat comes from our local natural food grocer in Buffalo, Lexington Co-Op. These peanut butter Rice Krispy treats are entirely dairy-free, rich and sweet and topped with a thick coating of perfect chocolate. And they are huge. I mean, they are so big that, like an impressive hamburger or submarine sandwich, they are difficult to get the mouth around but just as satisfying to conquer in their entirety. There’s no cutting these treats up and enjoying them delicately; you can only mow them down like a ravenous piggy until you can no longer take the intensity of this dessert bar.

So much less mess than Rice Krispies. And tasty.

So much less mess than Rice Krispies. And tasty.

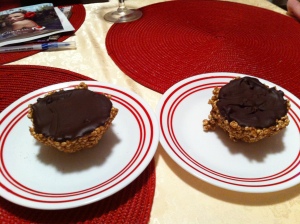
I decided to make my own peanut butter treats so I could control the sugar content. For my first batch, I found an interesting peanut butter at one of our local conventional grocery stores called Better’n Peanut Butter, a product that is certainly more processed than your average natural peanut butter but lacked some of the standard scary oil additives and came in a chocolate flavor. Oh my yum! So good. I bought some dairy-free, fair trade, organic cacao chips for the chocolate coating and used coconut oil to get them a bit stickier at room temperature.

There are two versions of this recipe: the one with the aforementioned chocolate peanut butter, and another I made subsequently that consisted of all natural peanut butter, chocolate chips in chip form rather than coating, and a bruleed sugar topping that made the entire dessert reminiscent of a s’more. But better. Try both versions, add your own “quirks” to them, and have fun! And trust me, you’ll never miss the marshmallows.

So yummmmmmyyyyy!!

So yummmmmmyyyyy!!

Better’n Shmallows Vegan Peanut Butter Puff Balls
3 c. puffed millet
1/2 c. Better’n Peanut Butter brand chocolate peanut butter
1/4 to 1/2 c. coconut oil
2 tsp. vanilla extract
a touch of honey
about 8 oz. chocolate chips (make sure they’re dairy free)

For these puff balls, melt the peanut butter, coconut oil, honey, and vanilla extract together in a skillet over medium heat in a double boiler, then pour over the millet in a stainless steel bowl once melted. Mix well, then pack into a 9×9 glass dish or cupcake tin, if you’re feeling adventurous. I used an ice cream cone making pan, which makes bigger treats than a cupcake tin would. Let freeze for 30 minutes, and melt chocolate over medium heat in the double boiler in the meantime. Pour the melted chocolate over the cooled treats and cool again until the chocolate hardens. Then, enjoy ’em!

Vegan Peanut Butter S’more Puff Balls
3 c. puffed millet
1/2 c. natural peanut butter
1/2 c. coconut oil
2 tsp. vanilla extract
a touch of honey
about 1/2 c. chocolate chips (again, vegan)
sugar and blow torch for the brulee topping

Melt and mix these treats as you would the others, except that you should mix for about a minute to cool a touch and then mix in the chocolate chips. Sprinkle fairly liberally with sugar, then freeze as usual for 30 minutes. Then, brulee the sugar until some of it is about black; this will give it a truly rustic s’mores feeling. Enjoy!

Let me know how they turn out friends 🙂

In the Pits – Homemade Deodorant and You

Yeah, this is happening.

Yeah, this is happening.

Back in March….

I knew I was sick this morning when I got out of bed only to drag my leaking nose and sore throat across the house to the couch, squinting and groaning as my husband opened the curtains to reveal a sunny sky and retreating gratefully into the warmth of my comforter. The outside light is still just too much. I sit here with my favorite sitcom on (How I Met Your Mother) and a collection of pills, salves, and other fixer-uppers; you’ll notice specifically my homemade lip balm, a bag of Burt’s Bees Honey Natural Throat Drops, and multiple vitamins.

Ever since I got back from Florida, my health has been on a steady decline. First, it was my eye, which developed a weird, non-pink eye pink eye sort of redness and irritation. The cold I have is an unfortunate addition, too. But the worst thing of all is the curious rash(es) I developed.

Pretty graphic...

Pretty graphic…

Now, I believe the first one was an allergy to laundry detergent, since it was less a rash than it was a bunch of non-red, non-itchy, raised little bumps only on my torso where I wore the washed shirt I believe to be the culprit. But this next one…this rash is awful. Irritated, itchy, red, slowly but definitively spreading, and covering my armpit and even taking over my tasteful sideboob. The problem began in Florida, where I was shaving a lot (almost every day) and applying a lot of deodorant. The other problem was spending a lot of time in the sand, sun, and surf while not showering every day because our skin would dry out. At that point, things weren’t too bad. But since I’ve gotten back, it’s just gotten worse and worse, particularly since I sweat so much at work!

Some of the best defenses for this ailment

Some of the best defenses for this ailment

To take care of my poor skin, I’m taking a number of precautions: 1) I’m not shaving until the skin is healed, 2) I’m not wearing my homemade deodorant until the skin is healed because the baking soda can be irritating to those with sensitive skin like me, 3) I’m washing all my bras, shirts, and anything that comes in contact with the pits with an extra rinse cycle to get any potential soap residue out, 4) I’m eating lots of vitamin C to boost my immune system, in addition to relaxing and smiling, 5) I’m putting plain coconut oil on my armpits, which is antifungal, antibacterial, and very soothing/healing to the skin and body, and 6) I’m staying well hydrated so my skin has the tools it needs to get better.

I'm considering making a new label for this baby!

I’m considering making a new label for this baby!

In the meantime, I won’t be able to use my incredible homemade deodorant, but my husband loves it! Now that he’s tried it and liked it long enough, I’ll be making him his own, which means I will no longer have to pick his armpit hairs out of it (boys are gross). I call my deodorant Texas Tea because, among other scents, it combines tea tree oil and Texas cedarwood essential oil (plus it’s funny because, instead of having deodorant manufactured and shipped, mine’s made right here! So it’s ironic, too). It withstood the test of its effectiveness in Florida (and in 4 days spent in the car), and it works great while I’m waitressing! I always smell like coconuts. So, needless to say, I’m never going back to store-bought. I hope you enjoy it as much as I have!

Natural Homemade Deodorant: “Texas Tea”
1/4 c. baking soda
1/4 c. cornstarch
8 tbsp. organic, unrefined, virgin coconut oil
5-10 drops tea tree oil
5-10 drops Texas cedarwood oil

UPDATE, 4.11: My plans to get better were all well and good, but better said than done. Along with those rashes, I was consistently sick with a “cold” for weeks, and I have only just now finished the antibiotics that my doctor prescribed me with for my bad sinus infection a few days ago. I’m finally returning to normal! And, finally, I’m back to wearing my AWESOME deodorant!

I also highly recommend scouring the internet for the many, many health and body benefits of coconut oil.

What to Expect When You’re Expecting…to Transition Between Vegan and Non-Vegan

20130309-190850.jpg

There’s me, folks, wearing my amazing sunhat and posing with my husband in Florida traffic. This is pre-sun, and also hours before the topic at hand: our vacation from the Buffalo winter that was also a vacation from our vegan lifestyle. The reasons? 1) We were traveling with a friendly carnivore, 2) We are still foodies, so we wanted to sample foods from the area, and 3) Since we’re not entirely ethical vegans or even 100% vegan, the lifestyle change was partially an experiment (mostly for Jonmark), not easy, and admittedly not always super fun given our many passions for food. So, we tried it a week away.

It began with Aunt Donna’s dinner: sausage and vegetable soup and grilled cheese sandwiches, great comforts after traveling through snow and wind to North Carolina. Normally, my body revolts against sausage of any kind, the mere smell or subtle taste on the tongue sending me into a blurry state of headache and salivation as my mouth reacts with tingling pain to the oral memory of nitrates. But this soup…mmm. And then I was suddenly a little kid treated to her favorite sandwich, legs swinging as I cheerfully and heartily partook in copious amounts of cheese for the first time in about 8 weeks. The apple pie with goat’s milk cheddar…that was when I knew we were past the point of no return as that first bite snapped, crunched, and slid down the tofuhole (piehole is too literal).

I was even dedicated at Subway the next day in one more attempt at salvation, but to no avail. Monday I horked down lox with toasts, capers, onions, sour cream (!), and the cherry on top of my fishy metaphorical sundae: hard-boiled eggs. Eggs may be a more recent love of mine, but damned if it’s not hard to give them up. I ate them with delight, in addition to some kettle corn during the girls’ night showing of Dirty Dancing later that evening. Ignoring the cheese and fish that normally comprise our diet, my other indulgences included a bacon cheeseburger from Sonic, a chicken enchilada at an authentic Mexican place we checked out, an ice cream sundae at Baskin Robbins, a few small sausages and meat pastries at a fun Middle Eastern restaurant in West Palm, quiches and berry crisp at Aunt Donna’s (oh her house!), and a mixed cold cut (aka turkey) sub from Subway today. And of course, various aeolis, dipping sauces, milk chocolates, and processed foods along the way. That’s a long list right here, kids.

I can speak for both my husband and I when I say that the transition back to meat-eating wreaked havoc on our bodies. I am absolutely certain when I say that the combination of putrid odors, gummed-up bowels, and organ-pressing gases that we experienced are enough to deter me from ever returning to a fully carnivorous diet again. Ever.

I wrote some of these words to you from Sandra, my best friend’s Elantra, as we made our return journey from Florida. My husband had recently released from the depths of himself a smell so repulsive that, as he locked the windows and cranked the heat, the fog cooked and morphed into an almost liquid state of human excrement that hung dense in the air and clung desperately to our nasal mucus. If you can imagine the smell of Frito corn chips and the swampy, rotting carcasses of former road kill, that is the best estimation I can make.

And now that we’re back to “normal”? Hungry and mildly craving a meaty sandwich, but feeling better, more regular, and less sluggish. So folks, from two people who experienced it firsthand, this is what to expect when you’re expecting to transition between between vegan and non-vegan.